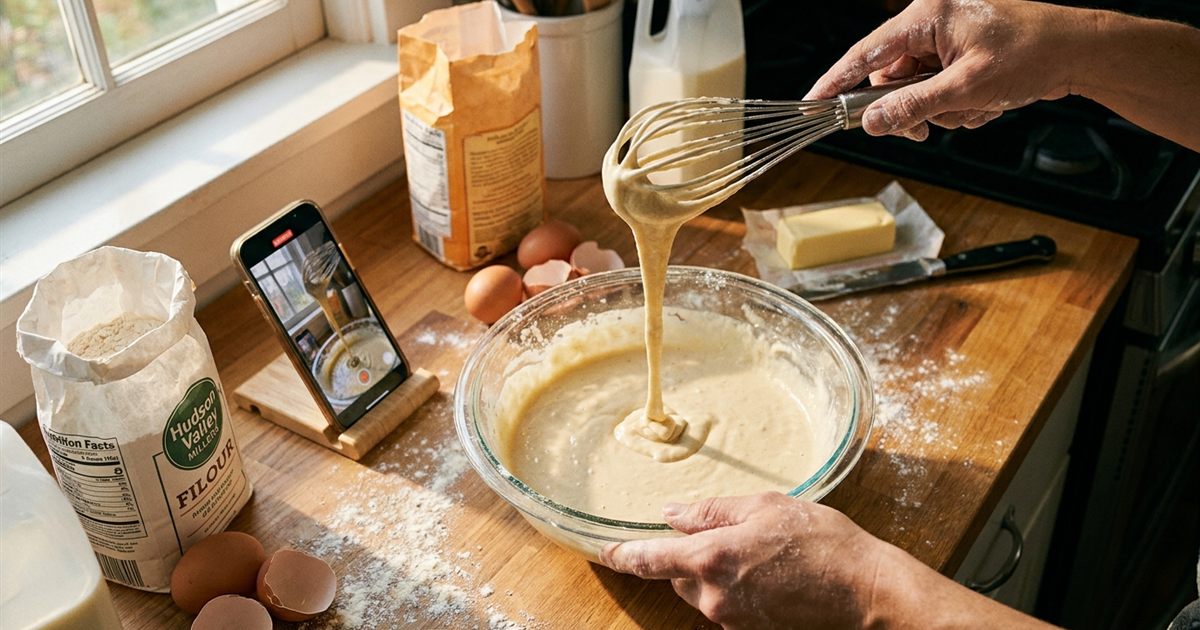
Some cooking steps are hard to explain with words and awkward to show with a still photo: how thick the batter should flow, how to fold the dough, how fast to whisk. A short looping GIF solves that in a few seconds. Food bloggers use them to show a single technique right inside the recipe, and home cooks use them to share a method with family. Unlike a long video, a GIF plays instantly, needs no sound and sits quietly next to the written step. This guide walks through how to film, trim and publish recipe GIFs that are clear, appetizing and light enough not to slow your page down.
Turn one cooking step into a looping GIF right in your browser
Make a Recipe GIF FreeWhen A Recipe GIF Helps And When It Does Not
A GIF is best for a single motion or a visible change: stirring until smooth, folding, flipping, drizzling, kneading, rolling or cutting. It is less useful for long processes such as baking time or for steps that depend on sound or smell, where text and timing in the recipe do a better job.
- Good candidates: folding egg whites, piping, shaping dumplings, braiding dough, a pour that shows the right consistency.
- Poor candidates: a thirty minute simmer, oven temperature or anything that needs spoken explanation.
Film The Step So It Looks Delicious
Food GIFs live or die on how clear and appetizing the clip looks. A few simple habits help:
- Use a stable phone stand or tripod: a shaky frame makes the GIF hard to follow.
- Shoot from above or at a clear angle: show the hands, the bowl and the result in one view.
- Use natural light near a window: it makes food look fresh and keeps colors accurate.
- Keep the frame tidy: remove clutter so the step stands out.
- Capture a complete action: record a little before and after so you can trim exactly.
Trim To The Moment That Teaches
The best recipe GIF shows only the part that teaches something. Instead of an entire minute of whisking, choose the two or three seconds that show the right motion. Open the video to GIF tool, add your clip, and set the start time and duration to that moment.
- Pick the first frame that already shows the ingredient in the bowl.
- End on a frame that shows the result of the motion or loops naturally.
- Preview the loop. Adjust the start or duration until it feels smooth.
If the motion repeats, such as whisking or stirring, the loop will feel natural. For actions that happen once, such as pouring, add a little pause at the end. You can learn how in how to make a GIF pause before it loops again.
Settings That Keep Food Looking Good
Food has warm colors and soft gradients, which are the hardest content for a GIF's limited palette. A few settings help keep it looking appetizing:
- Moderate width: around 500 to 700 pixels is usually enough for a blog column and keeps the file manageable.
- Frame rate of 10 to 15: smooth enough for stirring and folding without a heavy file.
- Short duration: two to four seconds is often enough.
If you notice grainy or banded colors in sauces and doughs, read why GIFs look blurry or banded for ways to improve it.
Build Step Cards Around The GIFs
A GIF is most useful when paired with a short written instruction. A simple step card contains a number, a one line instruction and the loop. This works well on a blog and in a printable plan.
- Step number and title: for example, Step 3: Fold the egg whites.
- One sentence of instruction: the exact action and what to look for.
- The GIF: showing the motion in a loop.
- A cue: what the mixture should look like when done.
If you want to build a sequence of images into a step by step loop, see how to make a step by step tutorial GIF from screenshots.
Make Your Blog Page Fast And Accessible
A recipe page with ten GIFs can become heavy. Keep each loop short, compress where needed and consider placing GIFs below the fold so the page loads quickly. Always write a text description of what the GIF shows so that people using screen readers get the same information. For heavier pages, review GIF vs MP4 to decide whether video is a better fit.
Also be mindful of accessibility. Constant motion can be distracting for some readers, so avoid placing many looping animations side by side. See GIF accessibility and flashing risk.
A Simple Example: A Pancake Batter Loop
Imagine a pancake recipe where readers keep asking how thick the batter should be. A still photo of a bowl does not help much. A three second loop of batter slowly ribboning off a spoon shows the exact consistency in a way no sentence can. You film the pour from a slight angle, trim to the moment the ribbon forms, set around 12 frames per second and export at roughly 600 pixels wide. The result is a small file that answers the most common question in the comments before anyone asks it.
That is the mindset to copy: find the one question readers ask most about a recipe, and let a short loop answer it.
Sharing Your Recipe GIFs
- On your blog: embed next to the written step.
- In messages: send a technique loop to a friend who is cooking along.
- On social: short loops can work well. Check platform specifics, for example GIF maker for Pinterest.
Only share footage you filmed yourself or have permission to use, and credit the original recipe author when you adapt a recipe.
Frequently Asked Questions
How long should a recipe GIF be?
Usually two to four seconds, enough to show one motion or change. Longer clips make heavier files and are harder to follow.
What is the best way to film a cooking step?
Use a steady phone or tripod, natural light and a tidy frame, and record a little before and after so you can trim exactly.
Will a GIF make my recipe page slow?
It can if you use many large ones. Keep each loop short, lower the frame rate and size, and consider MP4 for longer clips.
Do I need an account or software?
No. The video to GIF tool is free and runs in your browser, with no watermark and no signup.
Can I make a GIF from photos of each step?
Yes. The GIF maker can combine step photos into a short sequence if you do not have a video.
Ready to show your next recipe step in motion?
Make a Recipe GIF Free